
While I am sure this is not new or innovative information, the binding job on a quilt can complete or ruin the project. As such, I think it is important that everyone has access to instructions to properly complete binding using bias tape. Regardless of whether or not the second side is machine or hand sewn, the beginning “steps” are the same.
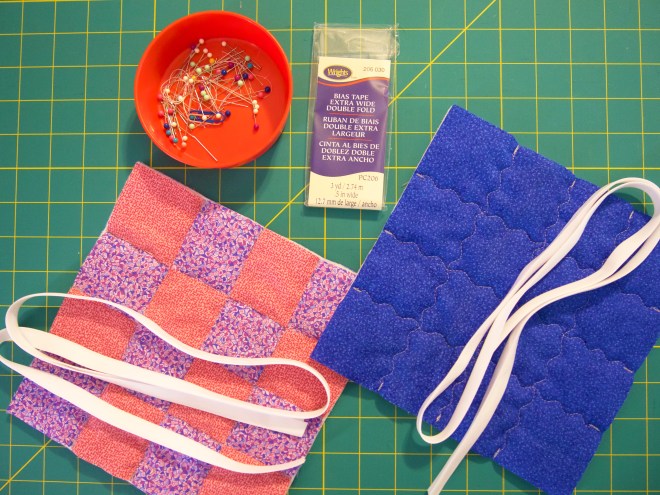
Above is everything besides the machine and thread that is necessary for binding a quilt. At this point, the quilting is done and the edges have been lined up. I pre-measured and cut the lengths of bias tape so it would be easier to work with than a single 3 yard length for an 8.5″ x 8.5″ mini-quilt.
*Disclaimer: I deliberately chose these fabric colors, binding, and thread so they would stand out from each other for the purposes of this post. In normal circumstances, I would not have this thread and binding with these fabrics.*
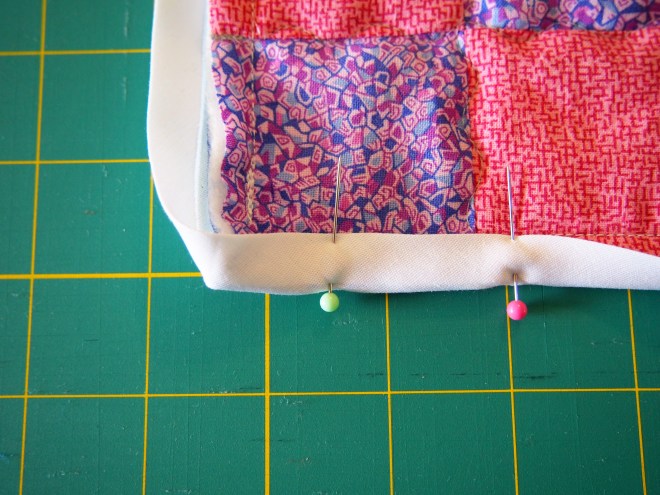
Step 1: Pin bias tape to the back side of the quilt
I have seen an alarming number of tutorials skip pinning or pin incorrectly. Yes, you will likely stab yourself 10 times in the course of sewing with pins, but there will be no question about the quality of the finished product (and honestly, is it truly a labor of love if you don’t contribute blood, sweat, and tears?). Another common issue I see is when the “first” side is the quilt top. I am firmly in the camp that the proper “first” side for attaching binding is the back of the quilt.
In this step, pin one edge of the opened bias tape starting in the middle of one of the quilt sides to the left towards the first corner. This will make sewing the binding easier.

When you reach the first corner, a few extra maneuvers will be needed so proper mitering can be accomplished.

Fold the bias tape up to create a 45 degree angle.

Then fold straight down.

Then pin each side of the fold. A triangle of fabric should be free-standing once pinning is done.


Continue pinning down each edge, completing the corners as you did the first until you reach the free edge from the start.

Once you get to the free edge, you have to decide how much overlap to have between the two ends. For a clean edge where the ends meet, fold the second end back into itself and envelops the first end. Pin the junction.


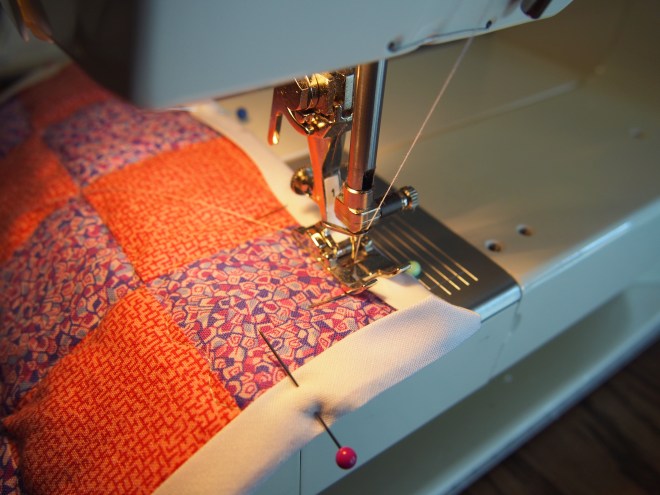
Step 2: Machine sew the first side
To attach the binding to the first side, I machine sew a presser foot distance from the edge of the bias tape. This will result in the sewn line to lie within the fold of the tape (which very well could be slightly inside the edge of the quilt top, batting, and backing).

I always make the first side that is sewn the one that has the ends of the bias tape on it, and I choose to start sewing somewhere in between the previously determined first end and the first corner. At each corner, backstitching will be necessary.

In part why I choose to finish the side with the bias tape ends first and last is so that it can be as tight of a fit as possible. This also helps ensure that there is no excess fabric to bunch around the edges.

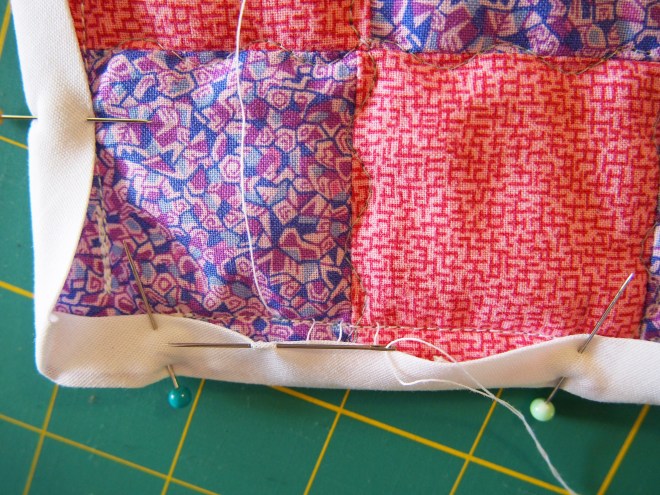
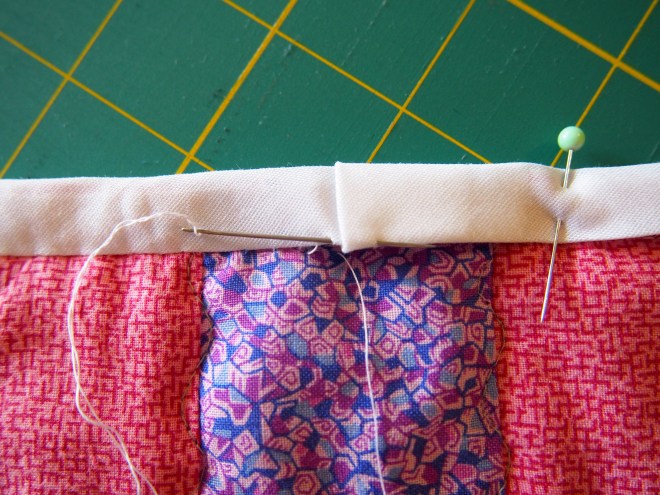
Step 3: Fold over and pin the bias tape to the front side
The goal of this step should be fairly self explanatory. This is also the step where the mitering on the corners is established. Thankfully this is an easy look to achieve.
Start folding the bias tape over to encapsulate the free edges of the 3 layers on any edge. I like to begin near the corner of the edge with the junction. Pin as you go. At the corner keeping the present side down will form a triangle of fold-over on the next side, fold the triangle down towards the quilt.
Pin the corner or close to the corner. Once the corner is complete, continue along the edges and repeat the corners as above.

Here is where the two bias tape finishes diverge.
Machine Sewing Step 4: Sew the bias tape to the front
Beginning on the edge with the junction of the bias tape ends, begin to sew close to the inside edge of the bias tape.
At the corner, pivot. With the needle down in the corner, raise the presser foot and rotate the quilt 90 degrees. Lower the presser foot and continue to sew.

Once you make it around to the starting point, you are done!


Hand Sewing Step 4: Sew the bias tape to the front
Recommendation: get comfy because this will not be a “quick” finish (now might be a good time to re-start your favorite TV series). Pictured below is everything you will need to accomplish hand sewn binding.

Working with maximum 2′ lengths of thread at a time; any more than that will get knotted or caught on the pins and it will make the process more frustrating.
As with every other step, I recommend starting on the edge with the junction between it and the first corner. Make a knot at the end of the thread and anchor the line approximately where you want to start sewing.

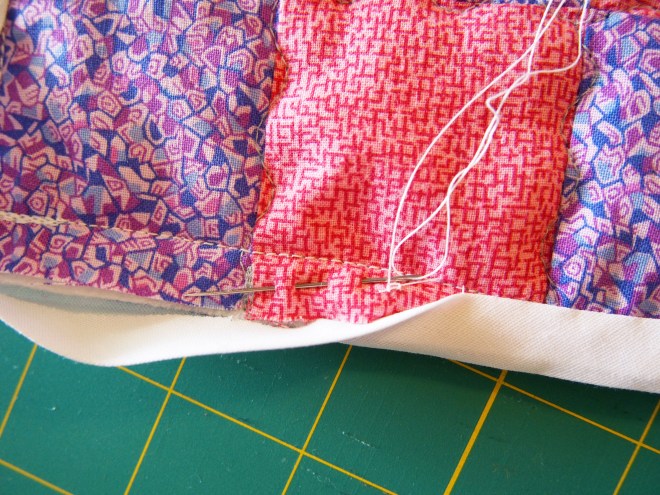
The first move from here should be in the quilt top, followed by the edge of the binding. Stitches made on the quilt top should be as close as is reasonable to the seam created by sewing the bias tape to the back. Stitches on the bias tape should be along the folded edge. For best results, the start of one stitch and the end of the next on the quilt top or the bias tape edge should line up, as shown below. Make sure you only go through the first fabric layer and some of the batting, not all the way through. Stitches should be approximately 1/4″ wide.
At the corner, make a small stitch in what will be the corner on the quilt top followed by a small stitch at the corner edge of the next side’s bias tape (pictured below). From here you will make stitches along the new side.

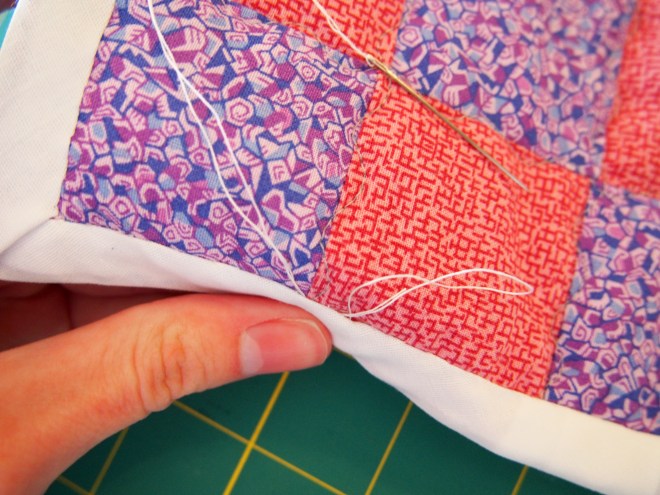
Keep truckin’ on until you have used most of the thread presently on the needle. At a logical place along the edge, create a couple of knots in the same part of the edge that the original anchor was made. I also like to run the needle and thread through a small adjacent hidden area to further anchor the line.
As with the first length of thread, anchor the new one and make the first new stitch on the quilt top. Continue in this manner until you reach the starting side.
Once the junction is reached on the quilt top, you will want to pay attention to the stitch sizes. This is so that you can ensure that an edge stitch will be needed at the junction.
Once you return to the starting point, things get a little tight. You will want to make knots in the same edge area as mentioned before, but before tightening the knot, you will want to make sure that the stitches leading up to it have been pulled taught.

Make a few more knots (harder than the first), and then do your best to snake (or baste, whatever description makes more sense to you) the tail of the thread under the edge (pictured below).
Clip the loose thread ends, and you are home free!

Look at that beautiful job you did!
Both finishes using bias tape are lovely and clean. The corners are beautiful, and the bias tape provides a polished look. Below I have included closeup looks and visual comparisons of hand sewing vs. machine sewing.


