
The purpose of this post is to serve as a general guide to quilting; it is not for a specific quilt and allows for immense amounts of personalization. All of my methods have been taught to me by an amazing seamstress, they do not cut corners, and they guarantee the same result every time.
*Disclaimer: I deliberately chose these fabric colors, binding, and thread so they would stand out from each other for the purposes of this post. In normal circumstances, I would not have this thread and binding with these fabrics.*
Below I have outlined the steps that are necessary and offer tips that I have found to be particularly useful. I use the term “step” loosely; I mean to describe this process in phases.
The most important advice I can give is this: never skip pinning.
Step 1: Pick a pattern, find fabric, and cut
There are hundreds of patterns and variations of patterns for quilt tops on the internet or printed in books and magazines. You could even make your own! Tip: choose a pattern you truly love – you will hit a point in the process where you want to burn or otherwise destroy the quilt, and if you are not absolutely committed to what you are doing, you may follow through.

Once you have decided on a pattern, you will need to decide on fabrics unless it is a pattern that has a fabric pack available for purchase. Take your time with picking fabrics; visit multiple stores, take pictures of fabrics you like at each store to compare, mix, and match. Figure out how much of each fabric will be needed, and always get cuts that are slightly more than that.
Always double, triple, and quadruple check measurements before you cut. Especially with bigger projects and cuts, you get one shot at cutting. Fabric is expensive, and it would be awful to have to go buy another large cut because of a negligent first cut. I have had my share of scares (thankfully none have actually been wrong) and it is something I do everything in my power to not repeat.
Step 2: Assemble the quilt top
Once all the pieces have been cut, they must be sewn together (that is a no-brainer, I know). No matter how small the pieces are, pin them together. Sure, it may seem unnecessary and time consuming, but you know what’s more time consuming? Having to seam rip and resew what has just been sewn because it didn’t line up properly (that is also a fast-track to the aforementioned desire to burn everything). Having to rip a seam out also increases the chances of something happening to the fabric and a need to re-cut or get more fabric entirely (which can be tricky depending on the fabric).

The example I have been using on these quilting posts is a simple block pattern done with fabric I found in my fabric drawer. Seams always have to be pressed; in this case, each row is pressed so the seams will be interlocking when sewn together (the bottom row seams were all pressed to the left, the next row of seams were pressed to the right, then the left, and the top seams were to the right), and the connecting seams are pressed open.
Step 3: Prepare batting and backing
Backing should be purchased at the same time as the fabric for the top to ensure it coordinates. The batting I use for all my quilts (in varying sizes) is found at JoAnn Fabrics.

They offer a variety of sizes, this just happened to be the bag I could find most readily.
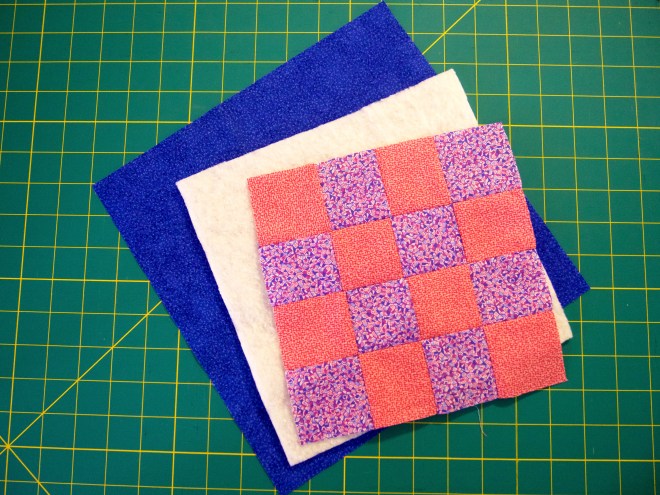
At this point, you should have three components readily accessible: the completed top of the quilt, backing (in some cases this is two cuts of the same fabric sewn together), and batting. Make sure everything has been rid of wrinkles or there will be issues when it comes to quilting. The quilt top and the backing can be ironed, but I do not recommend this for the batting. To remove the wrinkles from the batting, I lay it over a table and run an iron a few inches above the material using the steam feature, while periodically pausing to straighten it.
Step 4: Assemble the 3 layers
This step requires a lot of space and ventilation. I usually do this in my garage with a boatload of heavy duty plastic, tape or weighted objects, and tables (and clamps) if the size of the project necessitates it. Quilt Basting Spray (pictured below) is one of the single greatest inventions, and it will make this step far less frustrating. This step is a lot easier with two people wrangling the fabric. Assembly can be accomplished in whatever order makes the most sense to you.

There may be a more efficient way to do this, but the following paragraphs are a description of what I have found to be easiest – bottom to top.
My designated helper (a.k.a. mom) and I lay the backing face down as flat as possible on the plastic and secure the corners with masking tape or weighted objects. The backing should be larger than the top by a minimum of 6″ and possibly larger than the batting. We then (somewhat haphazardly) lay the batting over the backing. In a relatively organized manner, we fold or roll back approximately half of the batting. Start spraying the exposed backing with the basting spray in approximately 1′-2′ widths from person to person working from the middle towards the top or bottom edge. After each section is sprayed, unfold a corresponding amount of batting and “adhere” it to the backing using your hands to smooth any resulting wrinkles (I say “adhere” because while the spray holds the project together, it is very forgiving and can be readjusted as much as necessary). Once the first half is done, fold or roll back the other half and repeat.
Once both halves are adhered, I like to remove the tape or weights from the corners of the backing and flip the whole thing over to make sure no fabric bubbles have been created. If they have, you can pull the backing and batting apart as much as is necessary to flatten the area. Once everything is flat, flip it back over so the batting is on top and replace the tape or weights on the backing. I recommend taping or weighing down the corners of the batting if they extend beyond the backing, just in case.
Laying down the top requires a little more attention to alignment. I find this easiest to accomplish by folding the quilt top in half so the top and bottom edges are buddies. My helper (hi mom!) and I then take the short edges and hold them at either side of the previously laid backing and batting and lay the quilt top so it is centered on the backing (especially in the case of a seam). This is where the backing being larger than the top and batting comes in handy. As with the backing/batting, adhere the quilt top in sections from middle to the edges.
Once the top is adhered, sporadically pin all three layers together throughout the quilt. This helps to not only ensure that you stab yourself no fewer than a half a dozen times in the coming step, but that the quilting process (if done without a long arm machine) does not move any of the layers around; the adhesive can only do so much.
After pinning, use fabric shears to cut the batting and backing layers so they are around 3″ larger than the quilt top.
Step 4: Quilting
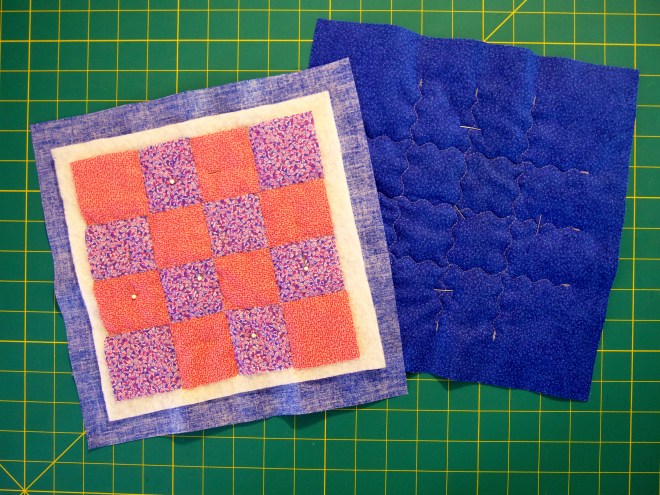
There is a lot of flexibility with this step. Some people choose to just stitch in the ditch created by each seam, some (like my example below) sew a wave-like pattern over each seam. Long arm machines are useful for more intricate designs, and some people choose to pay those who have long arm machines to take care of the quilting for them. The quilting step can be accomplished other ways, too. All of these are equally valid ways to quilt, and are truly at the discretion of the quilter.
Once the sewing is finished, pins can be removed, and the edges need to be squared up.
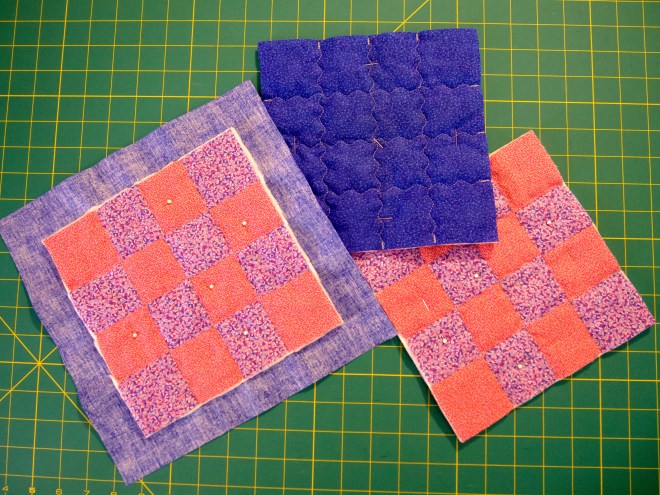
The middle and right “quilts” are cut for bias tape binding. Note that all 3 layers are now essentially the same size as the quilt top. The “quilt” on the left is cut for a binding job that is accomplished using the backing, which I discuss briefly in Two Types of Quilt Binding.
Step 5: Binding
I prefer to bind using bias tape. My goal as a quilter is to not make bias tape again, but I know someday a project will come along that will force me to do it, which will be fine, but inconvenient because of the literal day I will have to spend pressing it.
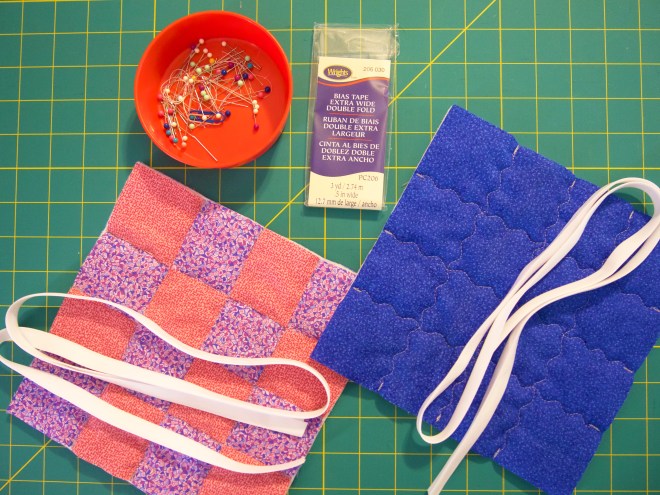
The specifics of this step are outlined in Quilt Binding with Bias Tape.
Step 6: Admire the finished product!
Congratulations! You have reached the end of your project!


Quilt making is a very involved project, and I thoroughly believe that the finished product is worth it. This is a structured process that allows for enormous amounts of flexibility as far as time commitment, color, size, and level of detail.
